

DIY (Do It Yourself), Gifts, Pregnancy & Birth, Games & Fun
DIY Instructions for a diaper cake for a baby shower
von Greta am April 20th 2016 Tags: Babyshower, Geburt, Gifts, Pampers, windeltorte
After it’s hailing baby news among our friends, we become organizational talents for hosting babyshowers. As a America fan I use this tradition of “Babyshower” with great excitement for many years here in Germany. And it shoes over and over again, that even here the expectant mom is thrilled to spend a day with herbest friends and full of surprises.
For our last baby shower I finally wanted to make a diaper cake myself and was desperately looking for proper instructions for making a pretty diaper cake looking not just “selfmade”. Since I couldnt find satisfactory instructions, we have spend an afternoon for a creative session. And in the end we have compiled instructions for making a diaper cake for you, with which you can fast and easyly make your own diaper cake.
You need the following items / equipment to make the diaper cake
- 1 stable underlay as a base, eg. a flat cardboard

- 50 Pampers diapers size 1 Newborn
- 50 Pampers diapers size 2
- 100 kitchen rubber bands
- 1 emtpy cardboard roll, eg from the kitchen paper towels
- Premium gift wrapping papers
eg in gold, pink or blue - Gift ribbon matching the sex of the baby
- 10 cm wide soft pink ribbon
- 3 cm widepink ribbon
- Toys for decoration, eg a soothing toy, a soother holder, baby oils or creams
- 1 pair of scissors
- Double sided advesive tape pr scotch tape
- Good mood 🙂
Instructions for creating a diaper care
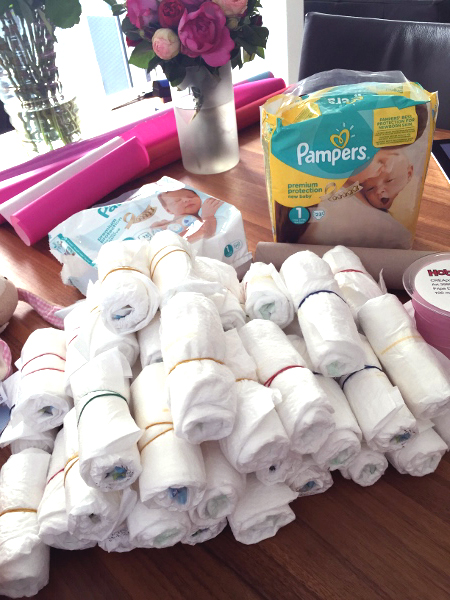 ROLL THE DIAPERS
First you are making small rolls out of the whole diapers . To do so, you are opening a diaper and the roll them up from the long side. In order to keep the roll together, fix them simply with a kitchen rubber band. This way, the expectant mommy can quite easy open the diapers later and use them for actual its purpose 🙂
Since it is a gift for a dear friend, I find it especially important not to save at the wrong place but to buy the only true and really good diapers – namely original Pampers .
Als 2-fache Mama kann ich euch bestätigen, dass alle anderen Windeln den Pampers um ein vielfaches hinterher hinken in Sachen “dichthalten”, “trockener Popo” und “Gemütlichkeit”.
As a 2-fold Mama I can confirm you that all other diapers lag behind Pampers many times when it comes to “hold tight”, “dry Popo” and “comfort”.
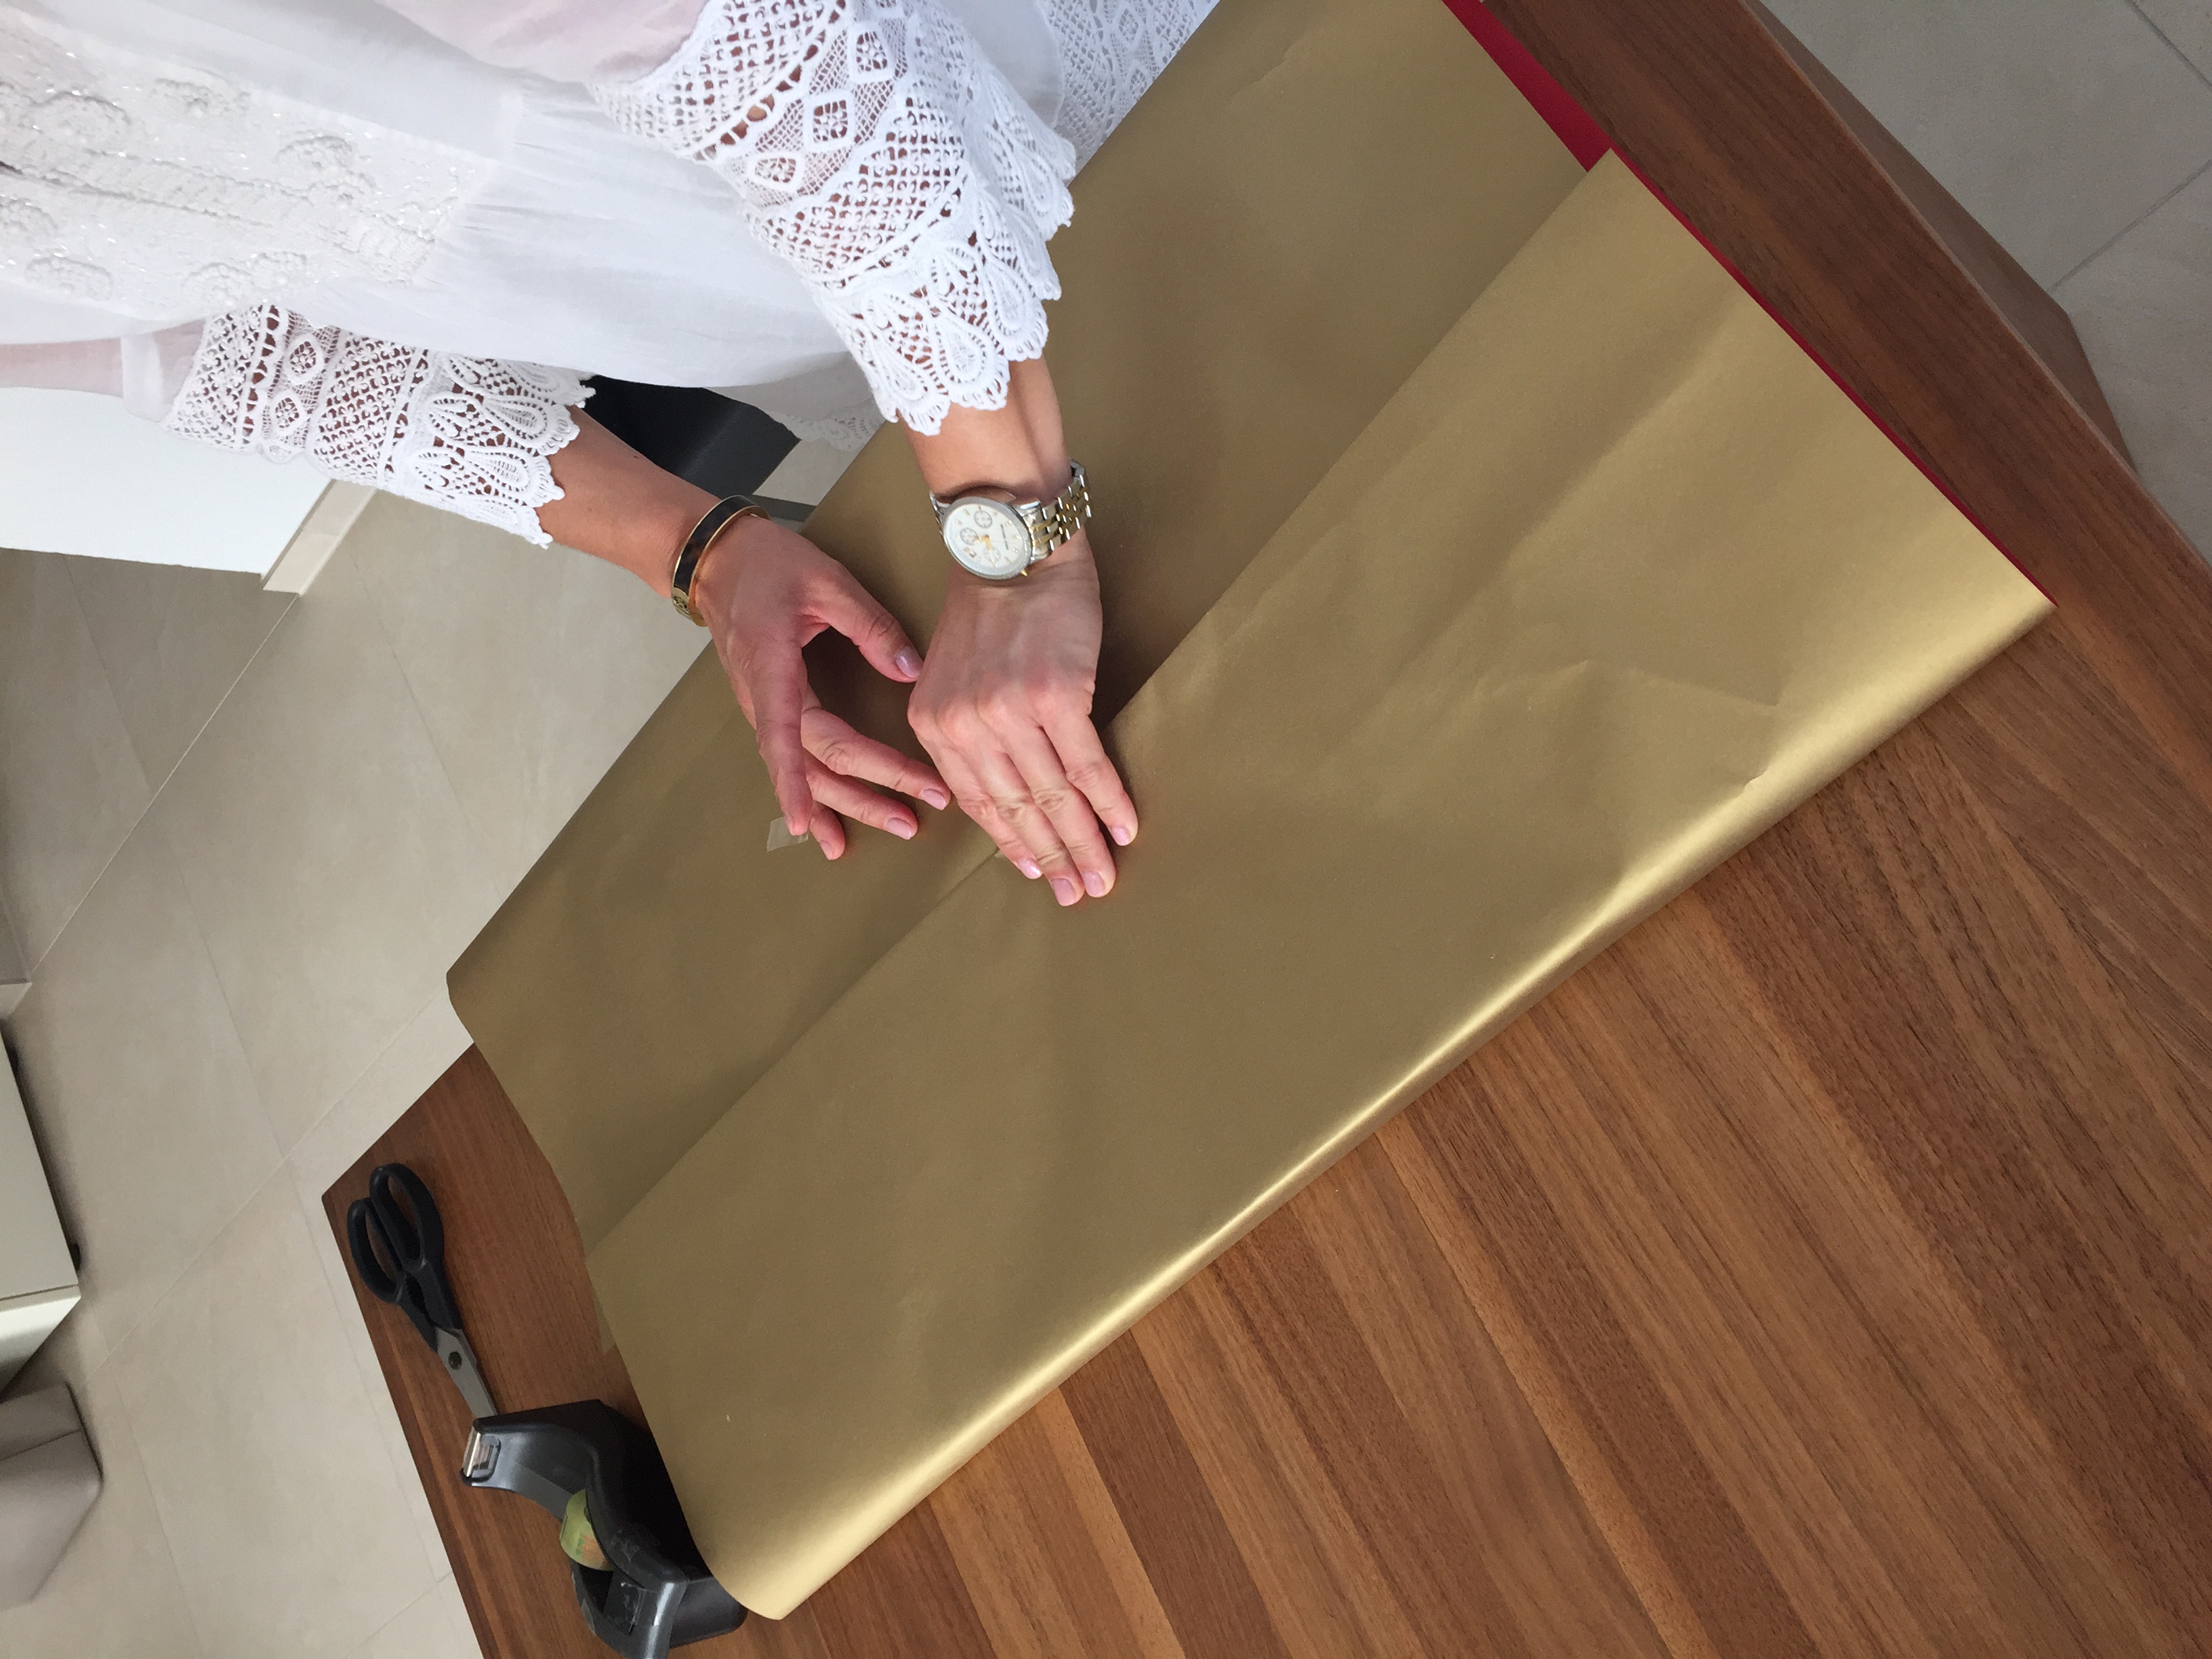
Wrap the base
Making the base pad looking pretty, we wrap it with gold wrapping paper. For this you can also use other gift wraps and materials.
Stack the diaper cake
Here you work ideally together as two, otherwise it will be a little tricky to fasten the individual cake layers.
 One of you is holding the cardboard tube, while the other of you places the individual diaper rolls around it
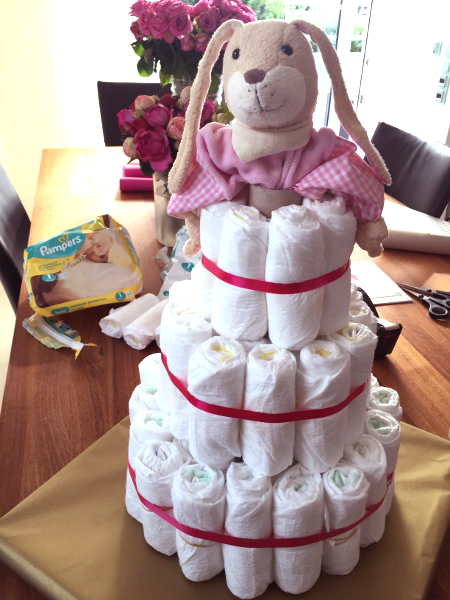
For the bottom layer, we recommend to take 2 or 3 rows diaper roles so that you have enough space at the top for stacking the other cake layers.
Once the bottom layer is ready, it mus be fixed with a fine ribbon (here in our example, the pink satin ribbon), so it can not fall apart. Of course, you can also use another band or a large, elastic kitchen rubber band .
After you’ve secured the lowest layer, you follow in the same way, for the middle and then the top layer.
Depending on how “lush” your cake should be, you can go further in the width with more rows diapers.
Cut off the upper edge of the kitchen roll tube carefully with scissors, so you can not see it anymore.
Decorate with gift ribbons
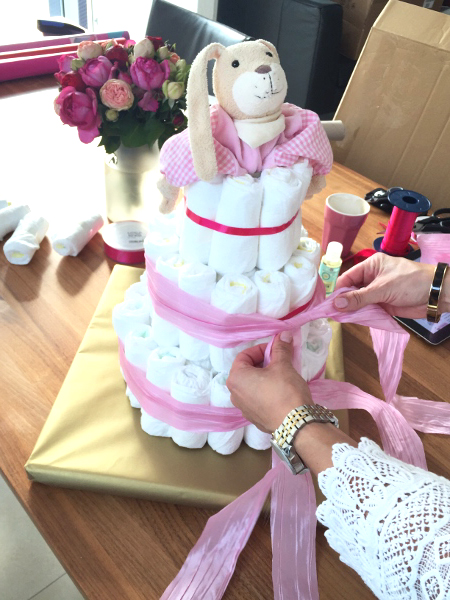
Now you can start decorating the cake. We take the 10 cm wide ribbon and tie it at the level of the straps around the individual layers of the cake. Attach the ribbon only to a node, but not yet with loops, because this happens in the next step together with the narrow band. We have used a high-quality satin crepe band from the florist supplies, which you can also bind nicely.
 IMPORTANT:
Don’t cut the strips too short but let enough tape for a large bow in the next step.
After the wide ribbons were tied around the cake, you take the darker, finer riubbon and bind it as well, over the wide band, around the cake layers. Also close it with a knot. Next, you bind a nice bow with the ends of both ribbons and pluck them then again pretty in shape.
Fix in on the base
After the ribbons are tied around the cake layers, you should attach the cake now to the base preventing it from sliding down later during transport.
Use either double-sided tape or if you don’t have any on hand, scotch tape, which you can roll in double rolls and fixi it by sticking it between cake and pad.
Our mini mouse was peacefully absent while we were building and crafting 🙂
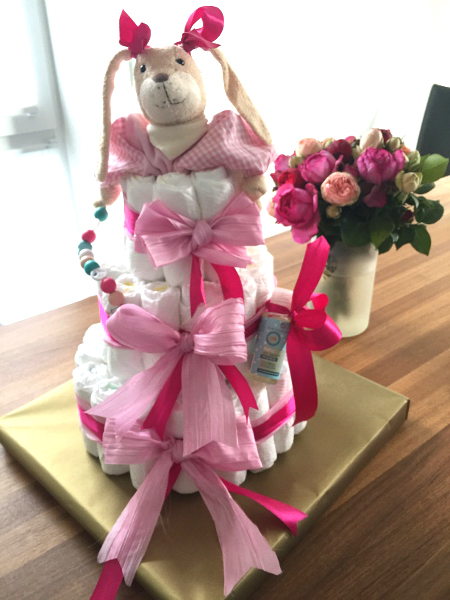
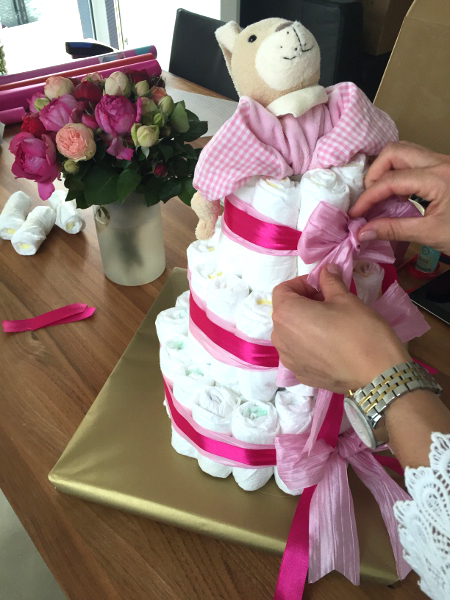
Decorate the diaper cake
Nun kommt das große Finale, nämlich das Dekorieren der Torte. Wir haben es relativ schlicht mit einem , einer hübschen sowie ein paar hochwertigen Pflegeprodukten von gehalten, da die Torte für sich schon sehr schön wirkte.
Now comes the big finale, namely decorating the cake. We have kept it relatively simple with a Soothy blanket by Käthe Kruse , a pretty Soother holder by Bebi Amsterdam and a few high-quality baby care items by Bellybutton since the cake looked very beautiful in itself.
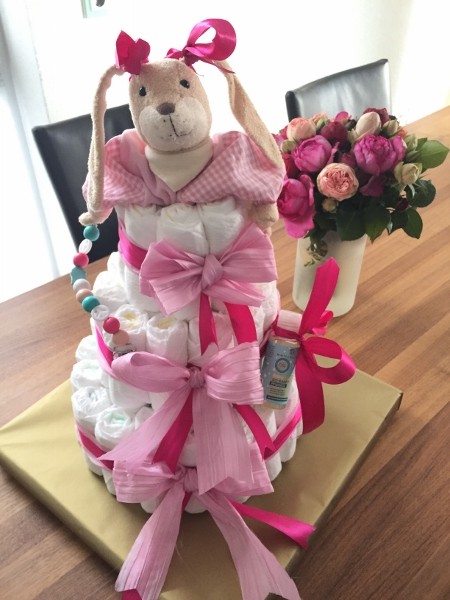
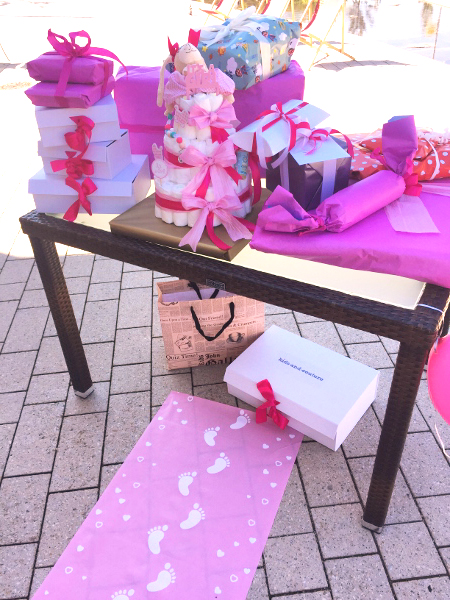
The final diaper cake for a baby girl
Also on our gift table on the day of the baby shower itself the cake looked simply ravishing together with the many white-pink kids-and-couture gift boxes ♥